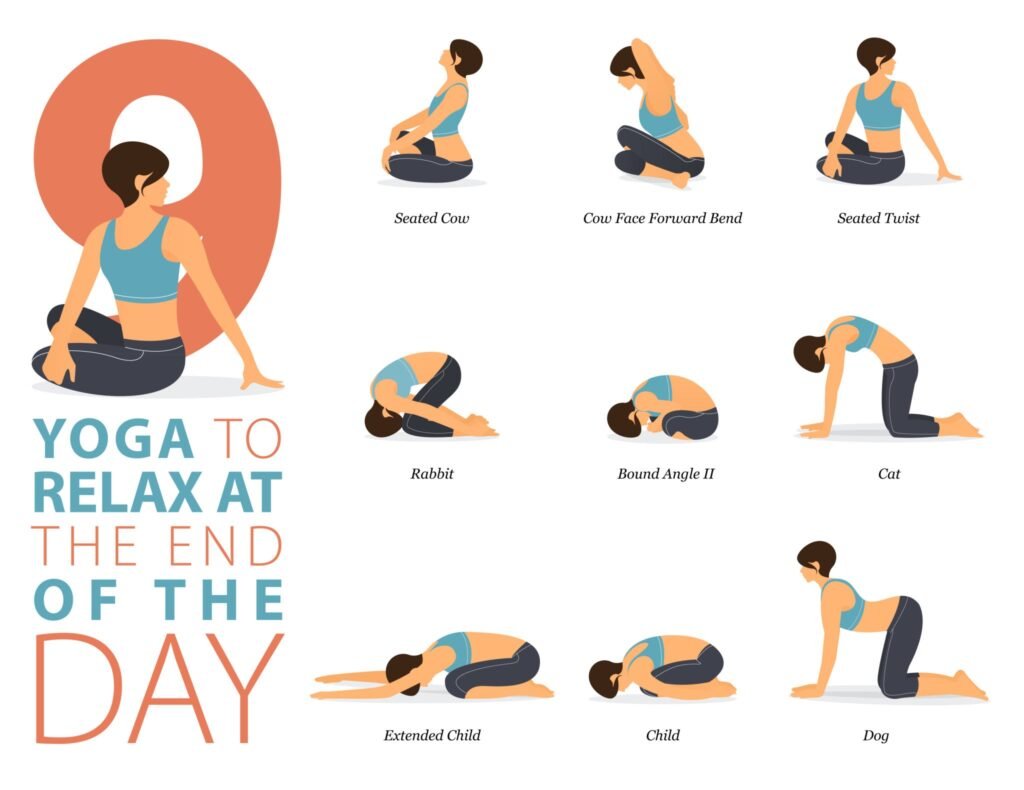
Yoga is an ancient practice that offers a holistic approach to health and well-being. While it’s often associated with flexibility and relaxation, it also has a profound impact on strength and stability. One area of the body where this is particularly evident is the hips. Strong and flexible hips are essential for maintaining good posture, preventing injuries, and enhancing overall mobility. In this comprehensive guide, we’ll explore the importance of strong hips and provide you with a detailed roadmap to achieving hip strength through yoga.
The Significance of Strong Hips
Before delving into the world of yoga for strong hips, it’s important to understand why hip strength is so crucial. Our hips play a central role in our daily activities, from walking and running to sitting and standing. Here are some key reasons why strong hips matter:
1. Injury Prevention: Weak hips can lead to various injuries, including hip pain, lower back pain, and knee issues. Strong hips provide stability and support, reducing the risk of injury.
2. Enhanced Mobility: Hip flexibility is closely related to hip strength. Strong hips improve your range of motion and make it easier to perform everyday activities and advanced yoga poses.
3. Good Posture: Proper hip alignment is essential for maintaining a healthy posture. Weak hips can lead to a forward pelvic tilt, causing an imbalance in the spine and resulting in poor posture.
4. Balanced Energy Flow: In yoga philosophy, the hips are considered the emotional storage center of the body. Strengthening the hips can help release emotional tension and create a sense of balance and grounding.
5. Core Stability: Strong hips are integral to core strength. A stable core is essential for overall physical strength and balance.
6. Emotional Release: In yoga, it’s believed that the hips store emotional tension. Regular hip-focused practice can help release and balance these emotions.
Hip-Opening Sequences
While individual poses are effective, creating a sequence of hip-opening and strengthening poses can provide a more comprehensive approach. Here’s a sample hip-focused yoga sequence:
- Child’s Pose (Balasana): Begin your practice in child’s pose to center yourself and prepare for hip work.
- Puppy Pose (Uttana Shishosana): Transition into puppy pose to stretch the hips and lower back.
- Downward-Facing Dog (Adho Mukha Svanasana): From puppy pose, move into downward-facing dog to engage and strengthen the hip flexors.
- Warrior II (Virabhadrasana II): Enter into warrior II to work on hip strength, balance, and flexibility.
- Pigeon Pose (Eka Pada Rajakapotasana): Move into pigeon pose to deepen your hip opening and strengthen the hip muscles.
- Bridge Pose (Setu Bandha Sarvangasana): Bridge pose helps to activate and strengthen the glutes and hip flexors.
- Boat Pose (Navasana): Transition into boat pose to engage your core and hip flexors.
- Tree Pose (Vrikshasana): Conclude your sequence with tree pose to enhance hip strength and balance.
Incorporating Yoga into Your Routine
To make yoga for strong hips a consistent part of your routine, consider the following tips:
- Set Realistic Goals: Start with attainable goals and gradually increase the intensity and duration of your practice.
- Diversify Your Practice: Incorporate a variety of hip-strengthening poses and sequences to keep your practice engaging.
- Listen to Your Body: Pay attention to how your body responds to different poses and adjust as needed to avoid injury.
- Use Props: Yoga props like blocks and straps can assist in achieving proper alignment and balance in hip-related poses.
- Consult a Yoga Instructor: If you’re new to yoga, or if you have specific concerns about your hips, consider working with a certified yoga instructor who can provide personalized guidance.
- Combine with Other Exercises: Complement your yoga practice with activities like walking, swimming, or strength training to further enhance hip strength.
7 Yoga Poses to Strengthen Your Hips and Hamstrings
Our hips play a crucial role in stabilising our body, supporting us when we walk, run, and engage in various activities. Strengthening the hips can significantly reduce strain on our leg muscles. This, in turn, can help heal running-related injuries in the knees and ankles, as the hips take on the responsibility of supporting our body weight instead of it being concentrated on the knees, ankles, and smaller leg muscles.
Moreover, our hips are also linked to our sense of grounding and our connection to the earth. They are associated with the Root Chakra, located at the base of our spine, which represents our foundation and stability in both our physical body and our life as a whole. Strengthening and stabilizing the hips can contribute to an overall sense of strength and stability in our body, mind, and life.
Now let’s explore some yoga poses that can help you achieve this goal.
1. Bird Dog (Parsva Balasana)
Begin in a tabletop position, with your hands under your shoulders and your knees under your hips. Ensure your fingers are spread wide, and press down through all ten fingers. Engage your core by drawing your belly towards your spine and bring your front hip bones closer together, activating your transverse abdominis. Maintain a long spine and neck, directing your gaze downward at the mat.
Inhale as you lift your left leg behind you, making sure your hips remain parallel to the mat. Flex your back foot and keep it at hip level. Internally rotate your left inner thigh and activate your inner thigh, glutes, and hamstring, lifting your hamstring upward while keeping your hips squared. Feel the strength and power in your raised leg. Hold this position and take three slow, deep breaths.
You have the option to either stay in this position or, if it’s accessible to you, extend your right arm forward while keeping your hips square, core engaged, and gaze directed downward to maintain a long neck and spine. Gently lower your knee and hand back to the mat. Now, repeat the same sequence on the other side, extending your right leg back and your left arm forward.
2. 1-Legged Dog (Eka Pada Ahdo Mukha Svanasana)
Begin in the Downward Facing Dog (Adho Mukha Svanasana) position. Lift your left leg upward and backward while ensuring that your hips remain level, and internally rotate your left inner thigh. Flex your left foot so your toes are pointing downward. Generate strength through your left leg by engaging your glute, hamstring, and quadricep simultaneously. Your hands should maintain contact with the floor as you press them away from you, spreading your fingers wide. Draw your abdomen in, and elevate your hips, pressing your right heel toward the mat. Maintain this posture and take three slow, deep breaths. Gently return your left foot to the mat. Now, repeat the same sequence with your right leg extended upward and backward.
3. Triangle Pose (Trikonasana)
Start from the Mountain Pose (Tadasana). Take a step back with your left leg, positioning it approximately three feet behind you, and angle it about 45 degrees forward. Slightly rotate your left hip forward and actively engage your left outer glute. Maintain a strong foundation by pressing into the outside of your back foot, ensuring strength throughout your entire back leg and hip.
Inhale and reach your right arm forward, then exhale as you lower your right hand to the inside of your shin, ankle, foot, or the mat. Keep the left outer hip engaged and strong. Press both feet firmly into the mat, with a particular emphasis on the inside of the front foot and the outside of the back foot. Maintain this posture and breathe deeply for three slow, deliberate breaths. Open up your chest, upper body, and top shoulder, and if your neck allows, gaze up towards your left thumb.
You have the option to transition directly into the next pose, Half Moon Pose (see below for details), or you can inhale, press into your feet, return to a standing position, and step your left foot forward to Tadasana. Repeat the sequence on the other side, with your right leg stepping back.
4. Half Moon Pose (Ardha Chandrasana)
Transitioning from the Triangle Pose (Trikonasana), shift your gaze downward toward your right foot and position your left hand on your left hip. Begin to bend your right knee and transfer your weight onto your right leg, simultaneously extending your left leg towards the back of the room. As your left leg lifts off the mat, flex your back foot and vigorously engage the muscles in your back leg, including your outer glute/hip, hamstring, and quadricep. Ensure that your left heel is pushing back towards the rear wall.
Draw your abdominal muscles inward toward your spine to activate your core. Place your right hand lightly on the mat or on a block for support. Start straightening your standing right leg while engaging your pelvic floor, core muscles, hamstring, and quadricep, as if you’re drawing your femur bone up into your hip joint. You can choose to either hold this position and breathe or, if it’s attainable for you, reduce the weight on your right hand and perhaps bring your right hand to your heart. Keep both legs strong and engaged. Hold this stance and breathe deeply for three slow, deliberate breaths.
Now, repeat the sequence on the other side with your left foot forward and your right leg extending back.
5. Warrior 3 (Virabhadrasana 3)
Commencing from the Mountain Pose (Tadasana) with your hands positioned at the center of your chest, activate your pelvic floor, core muscles, right hamstring, and quadricep, as if you’re lifting your femur bone up into your hip joint. Following this, transfer your weight into your right foot and extend your left leg backward. Engage both legs vigorously, elevating your kneecaps to activate your quadriceps, while also contracting your glutes and hamstrings. Keep your core strong and ensure your hips remain square, lowering your left hip if it’s positioned higher than your right hip.
You can opt to maintain this position, or for a more challenging variation, extend both arms forward, all while keeping your core engaged and your hips squared. Hold this pose and take three slow, deep breaths. Bring your palms back to your heart, and then gradually return to the Mountain Pose (Tadasana). To replicate the sequence on the other side, shift your weight into your left foot and extend your right leg backward.
6. Bridge Pose (Setu Bandha Sarvangasana)
Lie on your back, and bend your knees while placing the soles of your feet beneath your knees, moving them toward your sitz bones. This positioning allows your fingertips to brush alongside your heels lightly. If you prefer, you can insert a block between your knees and gently squeeze it with your inner thighs, which helps engage and strengthen those muscles.
Inhale, press your feet firmly into the mat, and lift your hips upward. As you do this, engage your glutes and roll up, one vertebra at a time, into the bridge pose. Upon exhaling, hold this pose and draw your heels back as if you’re attempting to slide them along the mat towards your hips. This action effectively engages your hamstrings and hips.
At this point, you have the option to either maintain this position or raise one shoulder, tuck it under your torso, then lift the other shoulder and draw them closer together, interlacing your fingers beneath your hips. Hold this variation and breathe deeply for three slow, deliberate breaths.
Once again, you can choose to either stay in this position or, upon inhaling, raise one foot off the mat, bend the knee towards your chest, and then exhale to straighten the leg toward the sky, ensuring your hips remain squared and engaged. Hold this extension for two slow, deep breaths before repeating the process with the other leg.
Gently lower your hips to the mat, one vertebra at a time, and remove the block if you had used it.
7. Happy Baby (Ananda Balasana)
Begin by lying on your back, bending your knees, and drawing them towards your chest, making sure they are slightly wider than hip-width apart. Next, extend your feet upward, so the soles of your feet face the sky. Place your hands on the soles of your feet and gently press your feet and knees down toward the ground, while also applying slight pressure by pushing your feet upward with your hands. This action creates a gentle traction effect in the hip joints. With the help of your breath, you can softly sway from side to side to further release tension in your hips if it feels comfortable. Then, maintain this posture and breathe deeply for five slow, deliberate breaths.
Conclusion
Yoga for strong hips is not only about physical strength but also about creating a sense of balance, emotional release, and overall well-being. Regular practice can help you develop the strength, flexibility, and stability you need to maintain good posture, prevent injuries, and move through life with ease. Whether you’re a seasoned yogi or a beginner, incorporating hip-focused yoga into your routine can be a transformative journey toward better health and greater vitality. So, roll out your mat, breathe deeply, and let your hips become the strong, stable foundation for your yogic journey.